Inflatable paddle boards, like Beyond Marina, are built tough, but accidents happen. A small tear or puncture doesn’t mean your sup board is done for! With the right tools and a bit of know-how, you can repair your inflatable sup and get back on the water. This guide walks you through the process using common repair supplies. Note that most repair kits include patches, but you’ll need to gather additional tools for a proper fix.
What You’ll Need
- Repair Patches: Included in most repair kits (e.g., PVC patches for iSUPs).
- Glue: Waterproof PVC glue compatible with your board’s material.
- Brush: For even glue application.
- Acetone or MEK: To clean the damaged area (use cautiously, as these are strong solvents).
- Tape: To frame the repair area and contain glue.
- Hairdryer: To warm and strengthen the bond.
- Plastic Spreader: A spatula or old credit card to press the patch smoothly.
Note: Ensure all supplies are suitable for your board’s material (typically PVC for iSUPs).
Step-by-Step Repair Process
1. Clean the Area
Wipe the damaged spot with acetone or MEK to remove dirt, oils, or contaminants. Ensure the surface is dry and clean before proceeding. Work in a well-ventilated area and avoid overuse of solvents to prevent material damage.
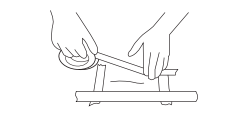
2. Outline and Cut the Patch
Use chalk or a pencil to mark a patch size that extends 1 inch (2.5 cm) beyond the damaged area on all sides. Cut the patch to this size, ensuring rounded edges to prevent peeling.
3. Tape the Area
Apply tape around the damaged spot to create a frame. This keeps glue contained and ensures a neat repair.
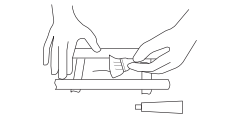
4. Apply Glue
Using a brush, evenly coat both the patch and the board’s damaged area with waterproof PVC glue. Follow the glue’s instructions for application thickness and drying time (usually a thin, even layer).
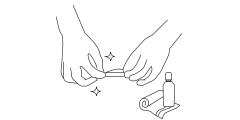
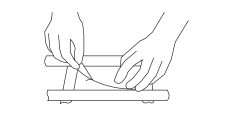
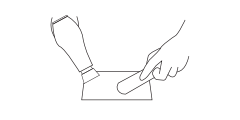
5. Place the Patch
Carefully apply the patch, starting from one end and slowly laying it down to avoid air bubbles. Press gently as you go to ensure full contact.
6. Heat and Press
Use a hairdryer on a low setting to warm the patched area for 30-60 seconds, enhancing the glue’s bond. Then, firmly press the patch with a plastic spreader (like a spatula or credit card) to secure it and eliminate any air bubbles.
7. Let It Set
Keep the board deflated and let the glue cure for 24 hours before inflating or using it. This ensures a strong, lasting repair.
Why Repair Your Paddle Board?
A quick repair extends the life of your inflatable sup, saving you from costly replacements. Whether it’s a minor scrape from rocks or a puncture from a sharp object, fixing your board keeps adventures going strong. With its durable PVC construction, a well-executed repair ensures your board remains ready for lakes, rivers, or coastal trips.
Repairing your blow up paddle board is straightforward with the right supplies and steps. By following this guide, you can tackle small damages confidently and keep your sup paddle board in top shape. Ready to paddle again? Grab Beyond Marina Paddle Board for your next water adventure!